Wednesday, September 10, 2014

The Divas are driving me a up a wall


The Divas are driving me up a wall – and I mean that figuratively and literally!


Well, since the last time I blogged, I have moved and so of course, the divas have too. We have much bigger digs and we are just loving it. Also since the last time we chatted, two new girls have joined us. There is Anabelle, who is an Orange and Spice Blythe and there is Hyacinth, who is a factory girl.
 
 
So with all of this going on, lots has changed and lots still needs to be done on the girls’ house.

The literal “up the wall” is that the house is now 3 stories tall on one side and 2 on the other. I am hoping for it to eventually be 4 stories tall on each side.

The figural driving me up the wall is that the girls are yelling that I am not building fast enough. Rebecca and Ramona have bedrooms that are pretty much complete. I just have finishing touches like wall décor and such to add.


 Raleigh’s bedroom is built, but she has been complaining of a stiff neck from sleeping in her chair
Hyacinth and Annabelle have been standing in the closet because they have no rooms or furniture of any kind.
 
          
 I understand their complaints, but when I have asked for their help, the divas have flatly refused siting the possibility of breaking their nails or messing up their hair. HEAVEN FORBID!!!

The way the girls have been acting, you would think I had done nothing at all on the house, when in fact I have gotten the bathroom and kitchen pretty much done.

I had to scrap my idea of making a shower. I couldn’t find the materials I had in mind to create the “glass” walls. I also had visions of making a toilet, but couldn’t figure out what to use. Instead, I bought a set on eBay.  For the time being, I have left the shower has is because it had a purple backdrop. I may eventually change it out to “faux” tiles, like I used on the bathroom walls.

 The mirror portion of the sink was already white, so that worked. The only change I made to that part was that I replaced the cardboard strips of printed toiletries with tiles and I put glass bottles of nail art stuff on the shelves along with Barbie accessories. The sink cabinet was BRIGHT pink, so I spray painted it. I may change out the cabinet handles at some point. 


The toilet was also glaring pink, so I painted it as well. I learned a valuable lesson about spray painting; never do it in hot humid weather. The weather caused the paint to bubble, wrinkle and just plain look yucky. I am going to put some things on the toilet tank cover to hide the imperfections.  Yes, girls, I know it does not look pretty and I will fix it. Give me a break my darling divas!

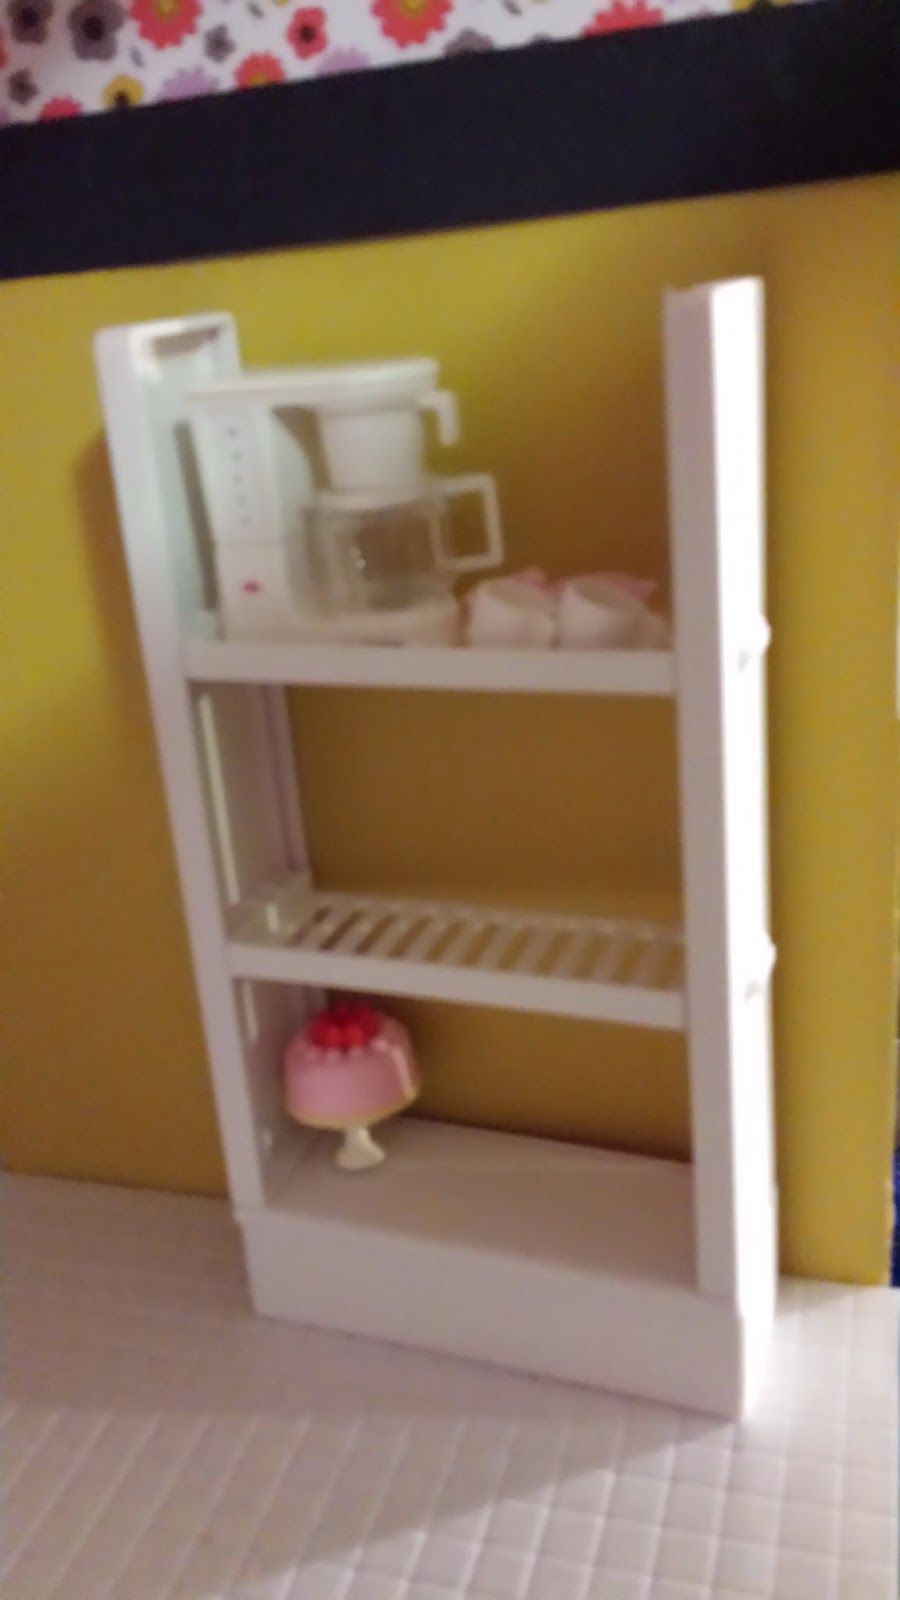
I did a few more things in the kitchen as well. I had a bright pink shelf that had been part of a Barbie refrigerator. I painted it white, as well. I found a perfect magnet in the shape of a drip coffee maker. I put it on the new shelves, along with some coffee cups. I am going to either make or buy a microwave  to put on the shelves as well. I add a rack of copper utensils near the stove and a wall clock made from a couple of buttons.
 
 
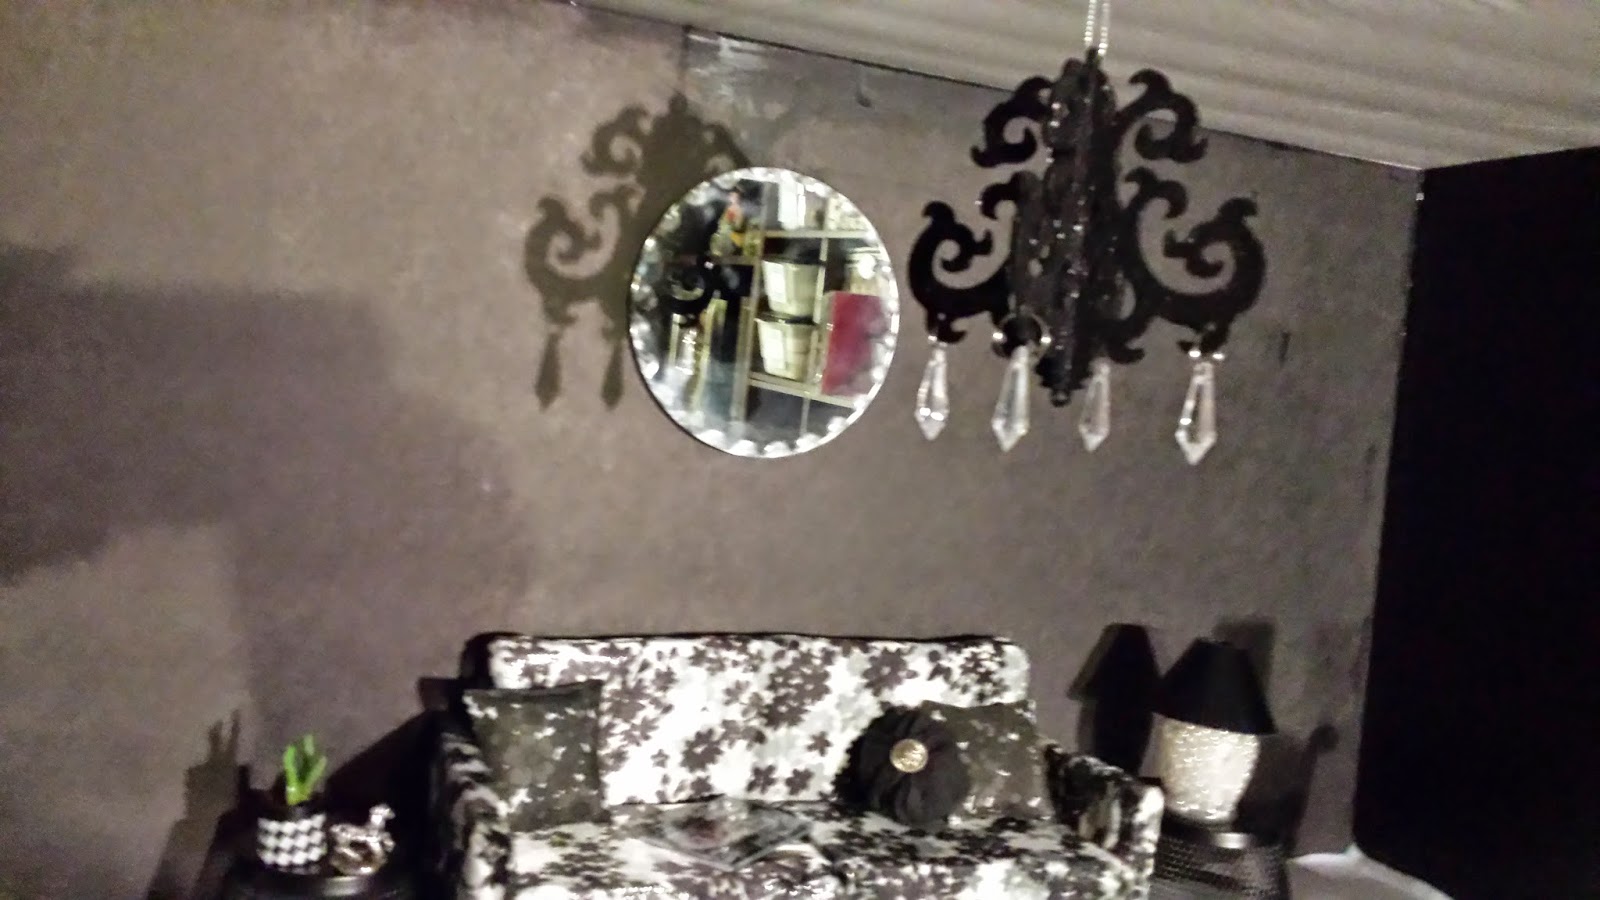
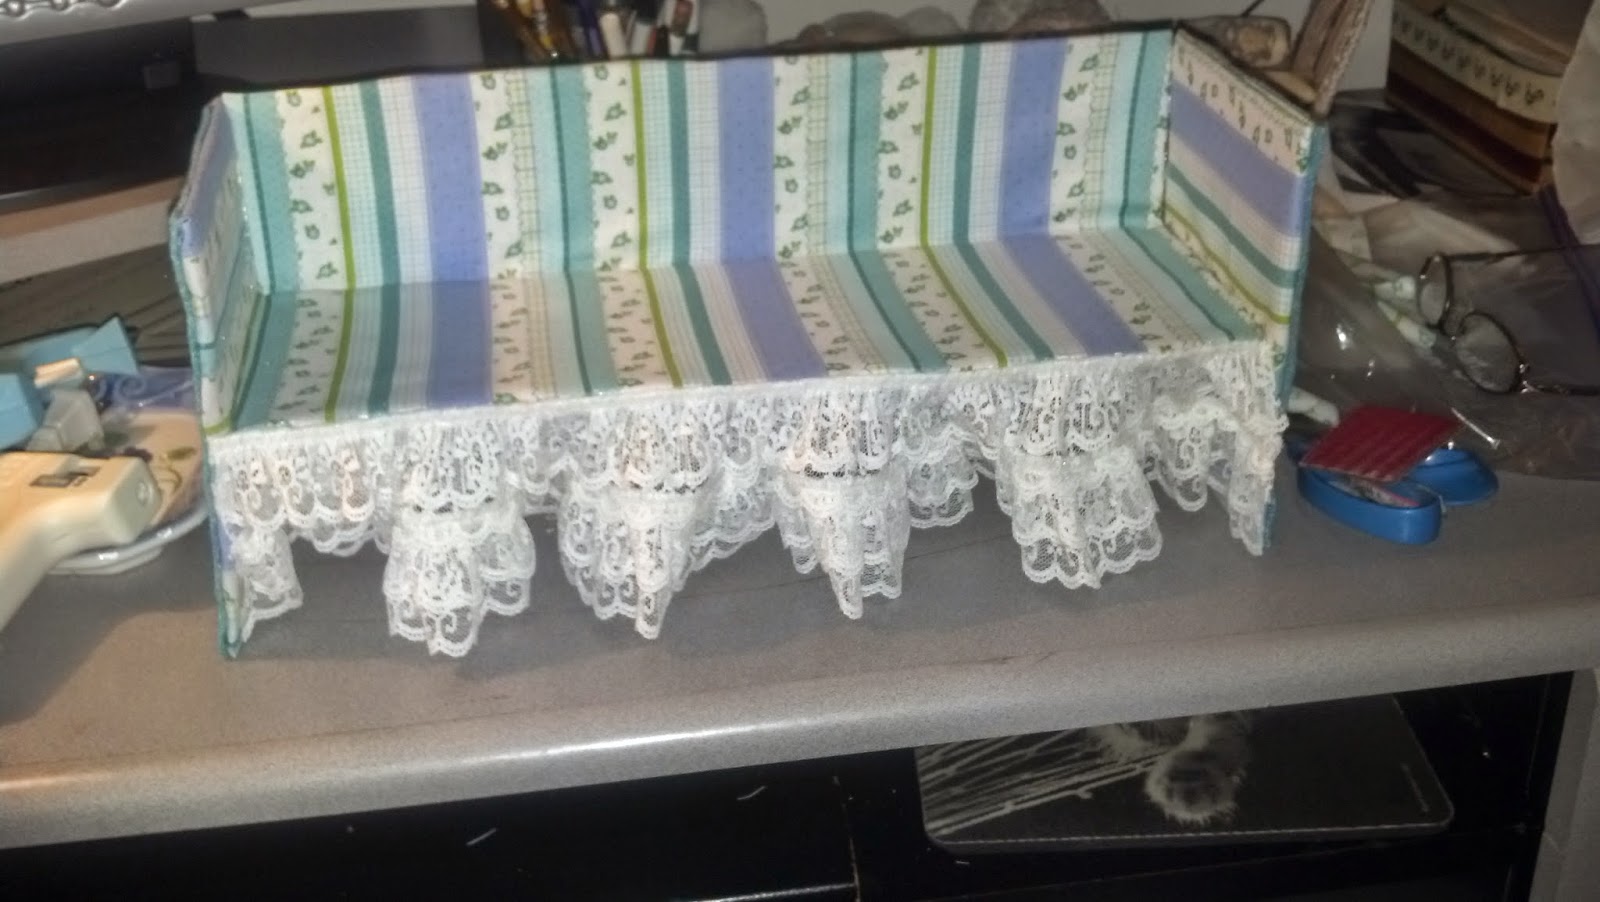
The living room was the next that I built. I used black foam core instead of the white. I put white felt on the floor for carpet.
 
 
 Remember the chandelier Christmas ornament I found? Well here it is hanging from the ceiling. Just wish it gave of some light because this room is very dark. I need to find a way to brighten up a bit.
 
I found another great ornament to use in the room as a decorative piece. Doesn’t it look so chic? The divas adore it as it reminds them of some of their modeling gigs in Paris.
 
Above the sofa, I hung a decorative mirror that was on clearance at a craft store. The lamp started its life as an air freshener that I bought at the dollar store. Once it was empty, I washed it out, filled the glass base with faux pearls and painted the shade with black nail polish. This room still needs a lot of work, but it is at least a start.
 

The next floor up is Raleigh’s bedroom. I covered the walls with contact paper. Her floor will eventually have carpeting, but I have haven’t gotten that far. The hutch in her room was a gift, so I don’t know much about it. The great chair and ottoman were from a swap and the wicker jar in the corner once held potpourri.  This room is certainly far from finished. I haven’t decided whether to purchase or make a bed. Either I will see the perfect one in completed form or find some doodad that inspires me.
 

The “wall” theme of this post has made me realize that I have used a different wall treatment on every room I have built thus far. The bathroom consists of upper walls I printed on computer paper and the faux tiles I printed on photo paper. The kitchen is done in scrapbook paper. Rebecca and Ramona’s rooms are both done in wrapping paper, but one came on a roll and one was flat, folded sheets. I prefer the rolls, btw, because the fold lines are almost impossible to get out. The living room walls were just a matter of using a different color foam board. Raleigh’s room is contact paper. Of course the black foam board was the easiest, but aside from that, my favorite is the contact paper in Raleigh’s room. Because of the nature of the contact paper, I did apply it before I put the room box together. I think it would have been a mess trying to apply it afterwards. I had to go slowly when applying it, but it looks great once I got it up. I know I am using rolled wrapping paper for the girls’ craft room, because I have already purchased it. I have no idea what I am doing for Anabelle or Hyacinth’s rooms. Shhhh! don’t tell them that or I will never hear the end of it! I am sure something will turn up to inspire me, just as it has in the other rooms.

The girls are going on vacation! I am taking them with me when I travel to New England to visit my family and friends. I am going to try and help them with a travel journal, but we may be having too much fun to remember to keep it up. It is going to delay construction on the house, but for once the divas aren’t complaining. They are all looking forward to coming along for my visit home.

Anabelle is packed and ready to hit the road. If your girls would like a suitcase like hers, you can find one in my Etsy shop, TheBlackOnyxBoutique
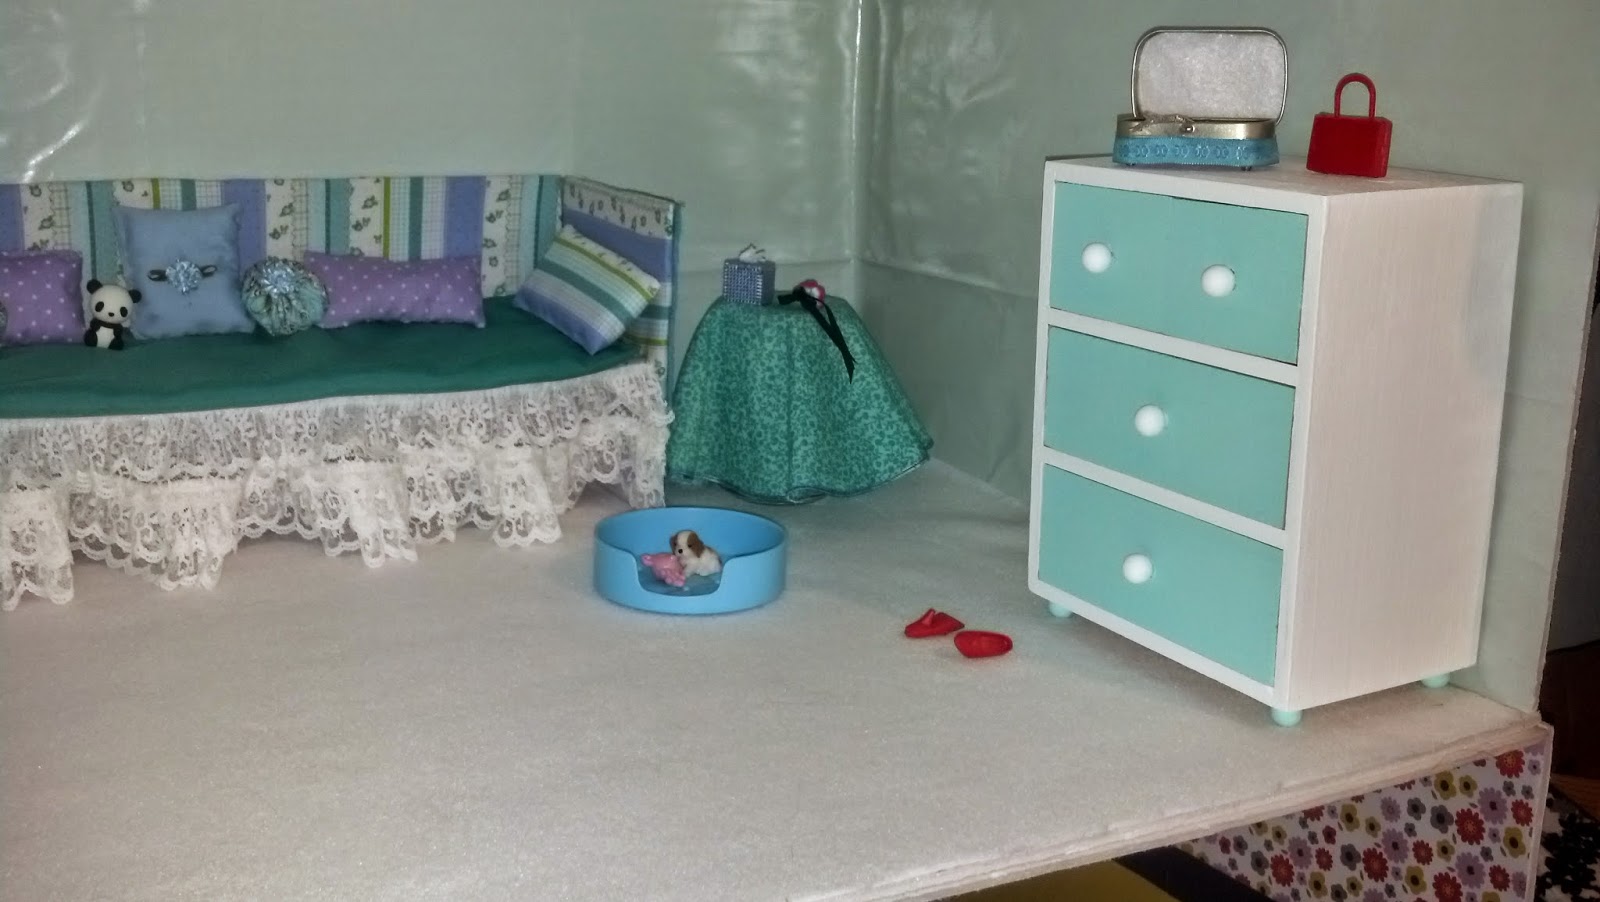
 

Thursday, May 15, 2014

Constuction Continues


The progress on the house for the girls has been slow. Why does life always have to get in the way of fun?  The bathroom is unchanged since my last post, but I have worked on the kitchen and there is now a second story!

Let's start in the kitchen. I did decide to use scrapbook paper for the walls. I used a solid and a print and divided them with a strip of black card stock.

The flooring is 1/12th scale flooring. It works as small tile, whereas it would be larger in a traditional dollhouse. It is glossy plastic, so it looks quite authentic.

I have also added some furniture. The table and chairs are from the Gloria Dining Room set. The chair seats were of course bubble gum pink! 
I knew the girls would never put up with that so I had to figure out how to make them match the divas' decor. I could have painted them, but I thought that I would try upholstering them. The seats popped off so I simply wrapped them in a square of fabric and glued it to the underside.
To complete the look, I glued Bunka, Japanese embroidery thread, around the edge to look like piping.
The glue was still wet in that pic, but it dried clear.


I am happy with the way the kitchen looks, but more importantly, the girls love it! There may be more items added in the future, but at least they have a place to eat.

As promised, I wanted to give a quick explanation of the construction of each room (floor). I use a full sheet of foam core for both the floor and ceiling. I cut one sheet in half and use it for the side walls and for a divider if it will be used as 2 rooms. The back wall is the width of the sheet and 18" in height.

I use Tacky Glue to put it together and use T pins to hold it together until it dries.

After making the mistake on the first floor of putting the entire box together and then trying to wallpaper, on the second floor, I put everything together without the ceiling and then did the wall paper and flooring.

The second box is Rebecca's room, although I will probably actually make that the 3rd floor and put the living room as the second floor.

I was going to make her room pink and as you may recall, I had started making things for it. Well, that was until I found some really cute fabric and Joanns and changed the whole color scheme. I used the fabric to make a day bed. I found the idea on-line, but I can't find a link. If I run across it again, I promise to share. Here are some pics of the construction of it:


Rebecca seems to approve of her new bed. Now on to the rest of her room.

I found some plain, pale aqua wrapping paper that would work perfectly as wallpaper. I couldn't paint the walls because foam core and moisture don't mix well.
See that cute little quilt at the end? My friend Josetta made it for me and it matches the fabric in the bed perfectly. I once again made a new tablecloth for the "jar" table, made a tiny tissue box for it and added a flower that I got in a swap. I will probably make a lamp for it too.

Also in the room is the vanity that I repainted and found a better stool for it. I made a cushion out of aqua felt. The flowers, painted on the mirror, where already there and were the perfect color!


I found this little wooden dresser at Michael's. I used a coupon and saved 40%!
I used acrylic paints, in aqua and white, to finish it. Rebecca should have lots of room for her clothes in it.
Her jewelry box, on the top of the dresser, is made from a small Altoids tin covered with scrapbook paper and ribbons.  Did you see the little puppy bed on the floor? It belongs to Alexander, Rebecca's new furbaby. He is so little that his toy teddy is bigger than he is!
So, that's where the house is so far. Still lots of work to be done on the rooms I have started and lots of rooms left to be built. I will keep you posted as construction continues. 

When you have a minute, please feel free to check out my Etsy store: The Black Onyx Boutique to see my latest creations.


Wednesday, March 5, 2014

Growing Pains

While Raleigh was very happy when her cousins Rebecca and Ramona moved in, things were getting a big crowded.
So, as darling divas do, the girls started complaining to me about there housing in the binders in the bookcase. I had to do something fast before they drove me totally crazy!

My first thoughts were to buy a pink, plastic, palace. When looking around, I realized they were over priced, for how they were made and what they were made of and wouldn't really suit the girls. Next, I looked at some wonderful wooden kits. These suited the girls better, but they were expensive and the rooms would be too small for the furniture I had already made for the girls.

I guess my only option is to build the girls a new home. Ok, so a beautiful house of wood.... No, that won't work. It would be expensive and heavy, plus, with my health issues, I can't manage most power tools any more. I needed another option before the girls got to hostile! Foam core! Perfect! Cheap enough, I can get it at Dollar Tree, light weight, I can carry lots of sheets at once and easy to cut with my Xacto or scissors!

Originally, I was going to glue all the rooms to each other, but changed my mind when I thought about the ultimate size of the house. I decided to build a series of boxes from the foam core and then stack them or place them side by side. I wanted the girls to have plenty of room, so each box is the size of a piece of foam core 30" x 18" with 15" high walls. Some of the boxes will be divided, some will be used as is.

The first floor box is divided and will be the kitchen and the bathroom. I should have taken pics of the box under construction, but I didn't think about it. I will do so for the 2nd floor box.

I needed wallpaper, flooring and such. There doesn't seem to be too much in 1/6th scale commercially made. Most of what is available is traditional doll house size, which is 1/12th scale. While some of that scale will work for Blythe, I decided to make what I could on my own. I went to Pinterest and found lots of miniature printables for just what I needed. Some I had to resize in Photoshop and some could use as is.

I decided to work on the bathroom first because I had the purple tub to use to create a color scheme. Of course, a bathroom calls for lots of tile. I found a great purple subway tile with a black border to use on the walls. Additionally, I found a purple  and white tile that I could use on the floor and the corner shower. I printed the tiles on photo paper to make them look glossy, like real tiles. Here is the coordinating  Bathroom Wallpaper, which I printed on standard computer paper. I glued everything on with a glue stick for 2 reasons, first, foam core will warp if it is exposed to too much moisture and second, I did have to seal my printies, which would run, if they were exposed to too much moisture.

Here are some pictures of the bathroom so far:

 The soap dish over the tub was a piece of plastic packaging and the soap is a scrap of foam core. The shelf is made the same way the one was done in the sewing room binder. It is longer and the shelf is made of corrugated cardboard. I cut down a bamboo skewer, painted it black, and glued it into the shelf brackets as a towel bar. The towels are a microfiber cloth from Dollar Tree and the bottles are beads I glued together.

The corner shower doesn't look like much at the moment. It is simply pieces of foam core glued together with the tile glued on it. The purple sun had a small mirror glued on the other side. I removed it, because of the weight, and glued it to the wall.
The first floor box has a divider, made of foam core, to create 2 rooms. On the other side of the bathroom is the kitchen.
I haven't done the wallpaper or the flooring yet, I may use scrapbook paper for it. The appliances and sink were all made by me using printables on photo paper, boxes, trash and cardboard. You can find the appliance printables on My Small Obsession. They are 1/12th scale and have to be resized.

The stove was made using a boutique tissue box with foam core for the top piece.

Rebecca is already cooking breakfast on it. 


The knobs are parts of snaps. Her pan, with the egg in it is an eraser.

The fridge was made from a shoe box.
The fruit bowl on the top was made from a cover and some pieces from a Christmas decoration.

Th sink was made from corrugated cardboard and a foam core back splash because I couldn't find the right sized box to fit between the fridge and the stove.


For the faucet, I used the hook portion from a suction cup and painted it silver.


The hot and cold knobs are beads and so are the cabinet knobs. The sink itself was a piece of plastic packaging that I also painted silver. I cut a hole in the card board and inset the plastic piece. You can see the hook also inserted into the cardboard. I covered this, and the foam core back splash in a black granite printable on photo paper.


The only piece I didn't make in the kitchen is the hutch. It is part of a Gloria Brand play set for 11 1/2" fashion dolls. It is missing the back piece. Once I make dishes to put in the hutch, I will put something on the back.

Both of these rooms still have a lot of work to be done and of course, there are a lot more rooms left to build. I will keep you up to date as I build. The other advantage of keeping the rooms separate is that I can work on whatever room I have the materials for.

If you would like to follow any of my boards on Pinterest to see where I get my inspiration, here's the link:

Also, if you would like to see what I have for sale right now, please visit me on Etsy at The Black Onyx Boutique

And last, but not least, yes, I am reusing the binders. This one used to be Raleigh's living room, now it is an idea book for their house.

Thursday, January 30, 2014

NKOTB! (New Kids On The Block)

NKOTB! (New Kids On The Block), No, not the boy band, although I have seen them in concert, in their home state of Massachusetts, back in the good old days. I have two new girls! Ramona and Rebecca have come to join Raleigh as part of my big eyed girls family.

The first girl who joined us is Ramona. She is a Middie Blythe, Jackie Ramone. I renamed her Ramona, to keep close to her stock name.
Middie Blythe dolls are only 8" tall. They are different from the regular Blythe girls in that their eyes are not different chips that can be changed with the pull of a string. Instead, they have one set of chips which can change from left, center and right gaze. They also have a tilt neck feature and their legs do not bend. I love this little cutie and think she make a great younger sister for Blythe.

Middies were actually introduced after the Petites were and currently, there seems to be less available for them. I have discovered that clothes made for the vintage 6" Holly Hobbie dolls fit her quite well. The outfit above was purchased on eBay and it was hand made to fit that doll.
In this picture, she is wearing one of Holly's original dresses. Although it is a little hard to see because of her black stand, Ramona is wearing black ankle boots made for Kelly, Barbie's baby sister. She can wear the shoes made for the modern version of Kelly, but not the older version. Although Kelly's clothes don't fit, some of the things that come with the doll work well.
Here she is with a scarf and Santa cocoa mug that came with a Kelly doll. As with any doll I have, I always look to see what I can borrow from others to see what might work. I came across this little dress, that also fit Ramona, but I don't know what doll it is originally from. Any help identifying it would be greatly appreciated.


My next new girl is Rebecca, who is a customized Jecci 5 doll. She is wearing an outfit I made for the January Sewing Challenge on Blythe Kingdom. It is also available on my new Etsy Store: The Black Onyx Boutique.
She was customized by Vertefae and I just love her. Jecci 5 dolls are approx. the same size as Blythe dolls. They have the color changing eyes and big head that Blythe is famous for, but the Jecci dolls are less expensive and the quality isn't as good. Being that I couldn't afford a custom Blythe doll, Rebecca presented a good option for me. Her customization includes matting, new makeup, carved lips, eye sockets and nose.

When putting Raleigh and Rebecca side by side, the differences become very obvious.


I have found that I do prefer the matte finish that Rebecca has on her face, but I would never change Raleigh's to be like that. Because Ashton Drake Galleries no longer makes Blythe dolls, I want to keep the original integrity as much as possible.

So now, with the Littlest Pet Shop Blythes and these girls, my Big Eyed family has grown to 7! I know that my collection will continue to expand, because I have my eye on several other dolls.

In the meantime, Raleigh, Rebecca and Ramona ask that you stay safe and warm, as this winter has been pretty rough for everyone.