If you are familiar with Blythe dolls, you know that by pulling the string on the back of her head, her eyes will change color. There are four sets of eye chips, in different colors, set at different angles, that make this possible. Even with all this fun eye movement, the one thing that her eyes don't do is stay closed. The eye lids do close in between each eye color change, but that's it. A lot of dolls have eyes that close when they are laid down. Blythe doesn't do that.
If you do a Google search, you will find many tutorials on how to give Blythe sleep eyes. The problem is that you have to open up her head to do this. Frankly, that notion scared me. It had made me nervous enough when I scalped her, never mind opening up her head.
Finally I found a tutorial that didn't require Raleigh to undergo brain surgery. LOL You can find it here:
Sleep Eye Tutorial. I found this a few weeks ago, but was still hesitant about doing it. After all, Raleigh is an Ashton Drake Gallery doll and they are no longer made. Her value (price tag) has gone up substantially since I bought her. And besides, I could never really replace her if she got ruined. Sure I could get another doll, but she wouldn't be Raleigh.
So the tutorial said to use a crochet hook. I didn't have one, so I substituted this hook tool.
Next, I was to pull on the little wire, that is part of a spring, in the slot, on the back of her head, until I saw an eyelet or loop. I proceeded carefully, but instead of seeing a loop, I watched the tiny wire slide through the slot into her head. I freaked out! I tested her eyes and they still worked normally. YAY! I knew I had to fix the spring and they only way to do that was to open her head. YIKES! That is what I was trying to avoid in the first place.
So, I found a tutorial about how to make the sleep eyes with her head open. Tutorial for Sleep Eyes. I got a screwdriver and took out the two screws in the back of Raleigh's head. Unlike some other brands, the Ashton Drake Blythe dolls have 2 screws and not 3. First thing that happened when the screws came out was that her head fell off her body. Now I am in complete panic! They don't warn you about that.
The picture is blurry because my hands were shaking. I was hoping that I didn't do any damage to the neck. Nothing I could do but to keep going and fix the spring.
The front and back plates had to be separated to fully open her head. There is a seam, so this isn't too hard. Since I had scalped Raleigh, it wasn't difficult to do. I am not sure how manageable it would be if her scalp was intact, but in the tutorial, they didn't remove it.
So now you can see the spring above her eye mechanism. There is no eyelet or loop at the end of it, which is why the wire went inside her head. Ashton Drake dolls differ from other in this case too. The end of the spring is just a small piece of wire, which has a slight bend in it, to hook over the slot in the back of the head. The only way to do the sleep eye technique, on an Ashton Drake doll, in my opinion, is to open her head.
The next step is to feed a cord through the hole where the spring is attached. I used a cord which is meant for making jewelry. Then, to keep the spring from moving around too much, you tie the cord to the other end of the spring. This was tricky without a loop to tie it through.
You can actually remove the spring entirely, but if you want to put her eyes back to normal, you will need it. I wasn't going to fiddle with it and so I just left it tied off.
After feeding the new cord into the slot. It was time to put Raleigh's head and body back together and test things. Thankfully, her neck was fine and everything went back into place perfectly. I tested her new skill and Voila! it worked!
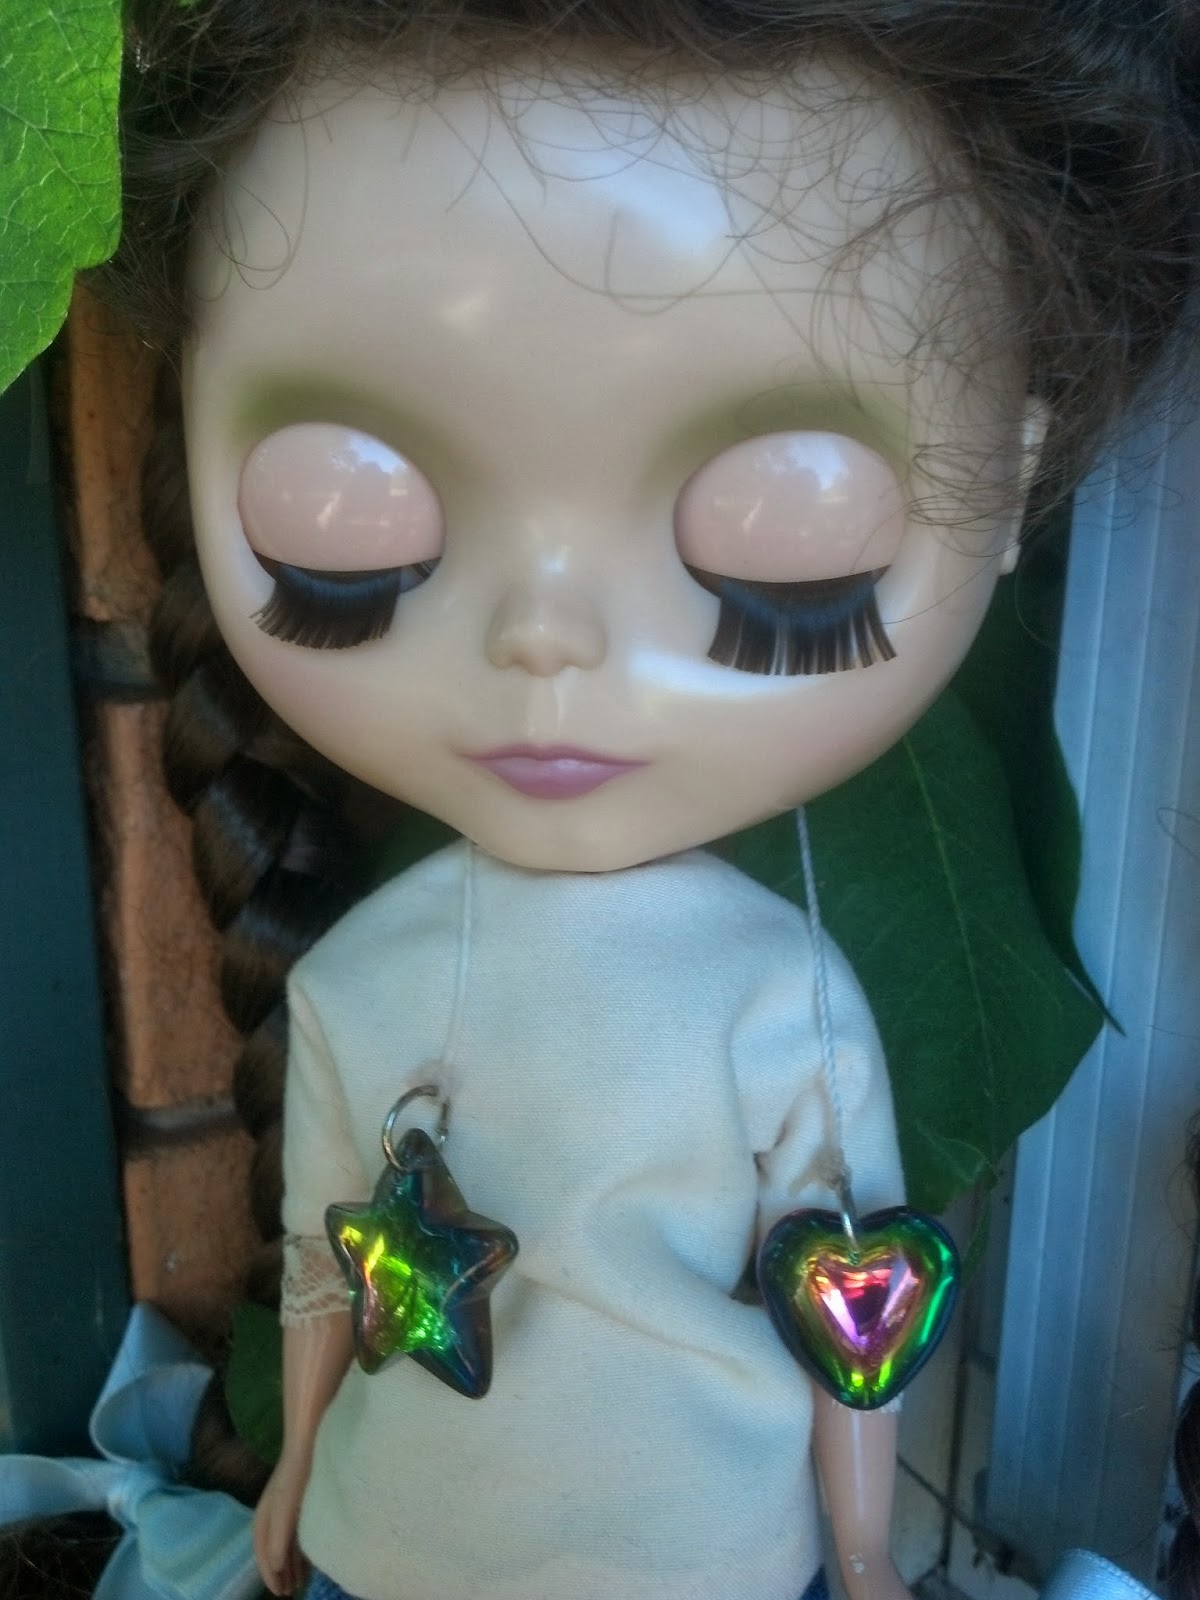
I had to put a pull ring on the new cord, but I decided to use a charm instead. Since I was doing that, I figure I would also put one on her original cord and take off the very plain pull ring. I also shortened the cord at that time. I always felt it was way too long and it was always getting in the wasy.
This funky glass star and heart were in my bead stash and thought they were perfect for Raleigh. Now, when you pull the heart cord, Raleigh's eyes close. Note: if you do this, make sure you pull hard enough to hear the "click" from the eye mechanism, at least in Ashton Drake models. When you pull the star cord, her eyes open and have changed to the next color chip.
I am very happy with the results of this, it was just a bit nerve wracking along the way.
I will close by sharing a new dress I made for Blythe this week. It is reversible, so you get 2 looks for the price of 1. You can purchase it here: Reversible Dress for Blythe
I have more of these versatile dresses cut out and ready to sew. You can look for them in the near future.
Wednesday, September 25, 2013
Thursday, September 19, 2013
No Skeletons In This Closet
Raleigh has been accumulating a lot of things lately. Her latest are from Canada, but I will tell you more about that later. Right now, I had all of her clothes, jewelry and other things in plastic shoes boxes. It kept the dust and pet fur off, but it was hard to find things. I had to come up with a better storage idea.
If you read my other blog: Colleen's Cottage Crafts, this wine box will look familiar to you.
I found it in the garage when I moved in with my fiance. I wasn't quite sure what to use it for, but I knew it would come in handy at some point. Suddenly it came to me. This box was going to be the solution for Raleigh's storage problems and the closet project got under way.
Since Raleigh and my other dolls keep me company in my sewing/craft room, I wanted it to coordinate with the decor in there. I went shopping and found 2 different shades of aqua acrylic paint that would work perfectly. I decided to paint the outside of the box the darker of the two shades and do the lighter one inside.
I was going to do two coats of paint, but I decided I like the time worn look of the wood after just one coat.
As you know, I don't have much in the way of funds for doll things right now, so if I have something on hand I can make work, I am delighted. I didn't have a thin enough dowel for closet rods, but I had these heart things and I thought they might work if I took them apart.
The heart came off the top, after a bit of persuasion, but unfortunately, the dowel was to short to span the sides of the box. Once again I had to get creative. I cut squares of foam core and stacked them on each end of the dowel until it fit the box perfectly. I painted them the same color as the inside of the box.
I glued the dowel into the stacks of foam core and glued them into the box. I didn't like the way the edges of the foam core looked, so I found some ribbon that was a good color and glued it around the stack of squares.
I made some tiny hangers using jewelry wire and started to hang some clothes.
I needed a place to store Raleigh's jewelry, hair accessories and glasses. On the door portion of the box, I attached a ribbon at the top and bottom with push pins. Glasses and hair accessories go on the top ribbon and earrings hang at the bottom. I also put some push pins on the slats to hold necklaces.
If you read my other blog: Colleen's Cottage Crafts, this wine box will look familiar to you.
I found it in the garage when I moved in with my fiance. I wasn't quite sure what to use it for, but I knew it would come in handy at some point. Suddenly it came to me. This box was going to be the solution for Raleigh's storage problems and the closet project got under way.
Since Raleigh and my other dolls keep me company in my sewing/craft room, I wanted it to coordinate with the decor in there. I went shopping and found 2 different shades of aqua acrylic paint that would work perfectly. I decided to paint the outside of the box the darker of the two shades and do the lighter one inside.
I was going to do two coats of paint, but I decided I like the time worn look of the wood after just one coat.
The heart came off the top, after a bit of persuasion, but unfortunately, the dowel was to short to span the sides of the box. Once again I had to get creative. I cut squares of foam core and stacked them on each end of the dowel until it fit the box perfectly. I painted them the same color as the inside of the box.
I made some tiny hangers using jewelry wire and started to hang some clothes.
Her dresses and longer things will go on the top, while tops and skirts will go on the bottom. I put some of her shoes on the bottom, even though she has a big shoe organizer. They just looked cute there. Raleigh got a new skate board (Dollar Tree, scored a package of 2 boards and extra wheels) this week, so maybe I will store that there instead of her shoes.
I needed a place to store Raleigh's jewelry, hair accessories and glasses. On the door portion of the box, I attached a ribbon at the top and bottom with push pins. Glasses and hair accessories go on the top ribbon and earrings hang at the bottom. I also put some push pins on the slats to hold necklaces.
I really think this was a great way to use the wine box.
My LPS Blythe dolls are jealous and want a closet too. I think I have something around here that just might work for their tiny things. I can even make hangers tiny enough. LOL!
Now, as for the new goodies from Canada. I belong to a group called Blythe Kingdom. They have swaps there that you can sign up for. Last month I participated in the Beach Babe Swap and my partner was from Canada. You can see some of the things she sent by looking at my Flickr Album. I loved everything she sent, but I will share a sneak peek by showing you my favorite. Donna T., my partner, hand knit this mermaid outfit for my LPS doll.
Isn't it amazing! The stitches are so small and delicate. She did a wonderful job. I have left it on my doll and don't think she will ever have it off. I can't wait to sign up for another swap, if was so much fun!Monday, August 26, 2013
Pink is Best for Pigs!
I bought a Barbie vanity at a flea market at a great bargain price. Of course it was bright Barbie Pink and had glitter stickers on it. It was not Raleigh's style or mine, so something had to be done about it.
There are some great tutorials on the web for redoing plastic furniture. This one tells you how to make faux woodgrain: http://www.dolls-n-daggers.com/Dolls/Forum/index.php?topic=297.0.
I decided to just paint it white. Normally, I would use spray paint. I didn't have any and as usual my budget is tight, so I just hand painted with acrylic paint. The key is to use several thin layers of paint to get good coverage.
The other problem with the vanity was that the only part of the stool that was included was the top.
I cut a section from a toilet paper roll to make a base.
Then I covered the entire piece with fabric and lace to match Raleigh's bedroom diorama. Here is the repainted vanity with the new stool.
I think it gives it a cottage look, which is much more to Raleigh's liking and mine.
While we didn't want the vanity to be pink, there are some things that color is perfectly suited for - PIGGIES! I adore pigs and one day I hope to have a teacup pig as a pet. In the meantime, there was no reason that Raleigh couldn't have one. I searched the internet for a pattern and found one here:
http://dollmaker.nunodoll.com/pig/pig.html. The pattern I used is on the second page. Raleigh is very happy to have a new friend.
Her piggy doesn't have a name yet. Could you help her come up with one?
There are some great tutorials on the web for redoing plastic furniture. This one tells you how to make faux woodgrain: http://www.dolls-n-daggers.com/Dolls/Forum/index.php?topic=297.0.
I decided to just paint it white. Normally, I would use spray paint. I didn't have any and as usual my budget is tight, so I just hand painted with acrylic paint. The key is to use several thin layers of paint to get good coverage.
The other problem with the vanity was that the only part of the stool that was included was the top.
I cut a section from a toilet paper roll to make a base.
Then I covered the entire piece with fabric and lace to match Raleigh's bedroom diorama. Here is the repainted vanity with the new stool.
I think it gives it a cottage look, which is much more to Raleigh's liking and mine.
While we didn't want the vanity to be pink, there are some things that color is perfectly suited for - PIGGIES! I adore pigs and one day I hope to have a teacup pig as a pet. In the meantime, there was no reason that Raleigh couldn't have one. I searched the internet for a pattern and found one here:
http://dollmaker.nunodoll.com/pig/pig.html. The pattern I used is on the second page. Raleigh is very happy to have a new friend.
Her piggy doesn't have a name yet. Could you help her come up with one?
Saturday, August 10, 2013
Little Did I Know
Little did I know that I have had 3 Blythe dolls and not just one. How could it be possible not to know this? Well, a couple of years ago, a friend gave me 2 dolls for Christmas. They were in sets called "Blythe Loves Littlest Pet Shop". I love them, they are tiny little dolls withe BIG eyes and they have little pets. I have them displayed in my craft/sewing room so I see and enjoy them every day. I saw the big eyes and saw the relationship to my Blythe doll and to me that was it. That was until a week or so ago. I joined a group called Blythe Kingdom. It was on that site that I discovered that the Littlest Pet Shop Blythe dolls, also referred to as LPS, were made as replicas of the original Blythe dolls. They are approximately the same size as the Petite Blythes and are collected, customized and loved my Blythe collectors. I have Playfully Plaid
and Buckles and Bows. She is wearing the new dress I made. It is available on my web site Blythe - The Big Eyed Girl
I think there will be more of these little cuties added to my collection in the future.
Raleigh had some more items added to her living room diorama, from the office supply section of Dollar Tree, as usual. This is meant to hold paperclips and such.
I thought it made a great end table, so I bought two.
Here's a close-up with a new table lamp I made from Peruvian beads.
There are other items made with these wonderfully, hand painted beads on my site, on the Accessories page. Here is a picture of one the vases made with these beautiful beads:
Raleigh also got a great vintage piece this week - a manual typewriter. She thought it would be fun to doing some writing old school style.
and Buckles and Bows. She is wearing the new dress I made. It is available on my web site Blythe - The Big Eyed Girl
I think there will be more of these little cuties added to my collection in the future.
Raleigh had some more items added to her living room diorama, from the office supply section of Dollar Tree, as usual. This is meant to hold paperclips and such.
I thought it made a great end table, so I bought two.
Here's a close-up with a new table lamp I made from Peruvian beads.
There are other items made with these wonderfully, hand painted beads on my site, on the Accessories page. Here is a picture of one the vases made with these beautiful beads:
Raleigh also got a great vintage piece this week - a manual typewriter. She thought it would be fun to doing some writing old school style.
I have also been working on Raleigh's bedroom this week, but we will save that story for next time.
Thursday, July 25, 2013
Two Debuts!
Exciting and fun week in Raleigh's world this week. I have been very busy creating a new room and a new fashion statement!
Being a seamstress, I thought it was only appropriate that Raleigh had a sewing room too. While I was out shopping, I found the perfect start for the room. I bought this package of sewing themed erasers at Michael's.
I knew the size of the sewing machine would work, but the appearance needed some adjustments. I painted it white with LOTS of coats of white latex paint. I wrote the word SINGER with red pencil on white paper and decoupaged it to the machine. I coated the whole thing with clear nail polish. I glued a mini black button on the front and dabbed on some latex paint to cover the holes.
For a desk, I bought a pre-primed wood plaque and some wooden spools and glued the together and painted it black.
The card of buttons was also made using my Sizzix and some mini buttons.
I also used a clock face button and glued it to a larger button for a wall clock.
The last project using my Sizzix was the dress form in the corner. I used corrugated cardboard again and glued it to a button. I added gathered tulle and a string of beads. I will probably add some color contrast to it in the future.
The room is a binder, just like the living room diorama. It is scrapbook paper on the upper wall. Since I only had 1 piece of the button papers, I cut it in half and used coordinating card stock for the bottom of the wall. I used ribbon for the border between. The floor is also scrapbook paper, decoupaged to foam core.
As if this wasn't enough for this week, I have more! A fashion debut as well. Raleigh has wings! I have created wings that can be worn by your doll.
The wings can be pinned on your doll's outfit, so they are very versatile. They are available on my web site in various colors and styles: Blythe - The Big Eyed Girl. Come check them out and let your Blythe soar!
Being a seamstress, I thought it was only appropriate that Raleigh had a sewing room too. While I was out shopping, I found the perfect start for the room. I bought this package of sewing themed erasers at Michael's.
I knew the size of the sewing machine would work, but the appearance needed some adjustments. I painted it white with LOTS of coats of white latex paint. I wrote the word SINGER with red pencil on white paper and decoupaged it to the machine. I coated the whole thing with clear nail polish. I glued a mini black button on the front and dabbed on some latex paint to cover the holes.
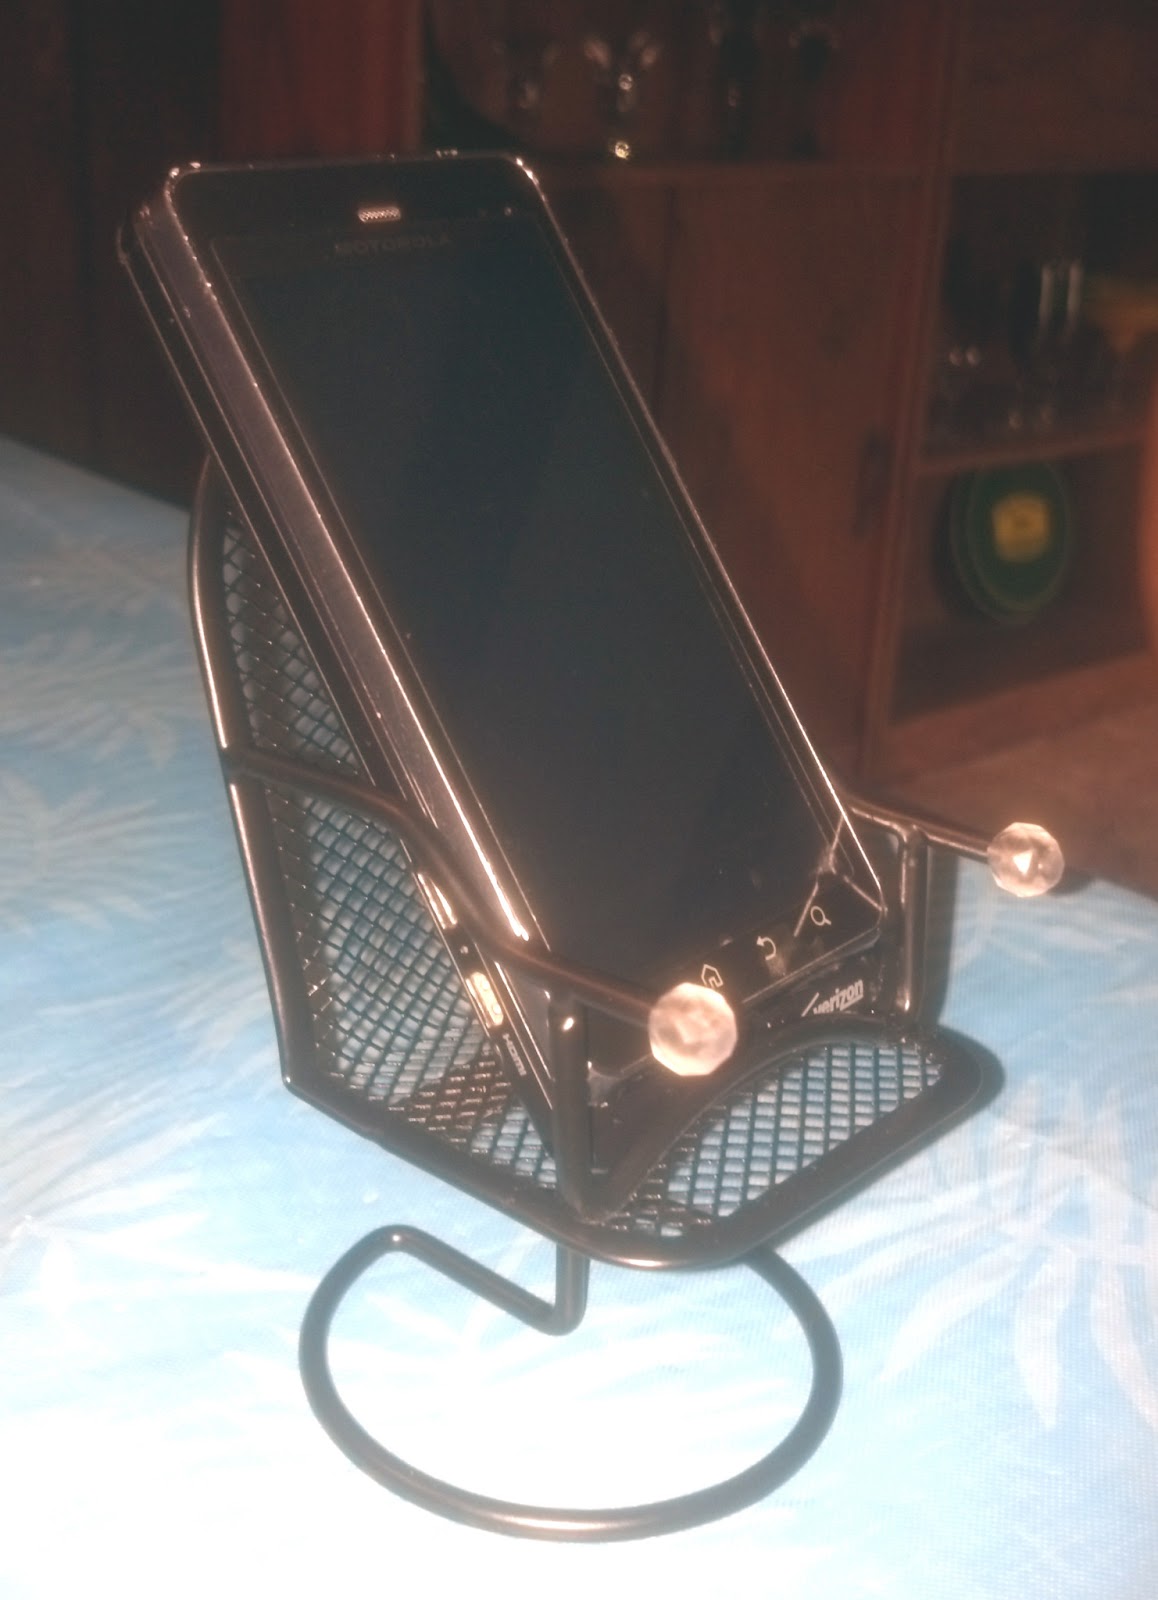
It's a chair!
It's a chair!
Actually, it is a cell phone holder
But it makes a perfect chair for Raleigh and was the perfect addition to the sewing room.For a desk, I bought a pre-primed wood plaque and some wooden spools and glued the together and painted it black.
I used the spools and some craft sticks to create a shelf, which I also painted black.
I used a tag die and my Sizzix and cut some corrugated cardboard to create bolts to wrap fabric on for the shelf.The card of buttons was also made using my Sizzix and some mini buttons.
Excuse the blobs, the glue wasn't dry when I took the picture.
Another project using my Sizzix was the wall shelf. I use the same die that I did for the bolts, except a longer tag and cut some cardboard. The brackets were made with a photo corner die. That die is too thin to cut cardboard, so I cut card stock and glued layers together until I got the desired thickness. I covered the edge with mini ball fringe to cover the cardboard.
I repainted the mini dressform eraser to use as a decorating accent in the room. For other decor, I used some decorative buttons. I cut the shanks off and used mounting tape to hang them on the walls.
The room is a binder, just like the living room diorama. It is scrapbook paper on the upper wall. Since I only had 1 piece of the button papers, I cut it in half and used coordinating card stock for the bottom of the wall. I used ribbon for the border between. The floor is also scrapbook paper, decoupaged to foam core.
I am happy with the way the project turned out. I am going to keep it on display in my sewing room, whereas the other dioramas I make will be used as needed. I would like to make some more little accessories pieces for the room in the future.
As if this wasn't enough for this week, I have more! A fashion debut as well. Raleigh has wings! I have created wings that can be worn by your doll.
The wings can be pinned on your doll's outfit, so they are very versatile. They are available on my web site in various colors and styles: Blythe - The Big Eyed Girl. Come check them out and let your Blythe soar!
Subscribe to:
Posts (Atom)